
|
| MOQ.: | 1 |
| মূল্য: | To be quoted |
| স্ট্যান্ডার্ড প্যাকিং: | সুরক্ষা কার্টন প্যাক বা পাতলা পাতলা কাঠের বাক্স |
| অর্থ প্রদানের পদ্ধতি: | টি/টি |
1.সংক্ষিপ্ত বিবরণ:
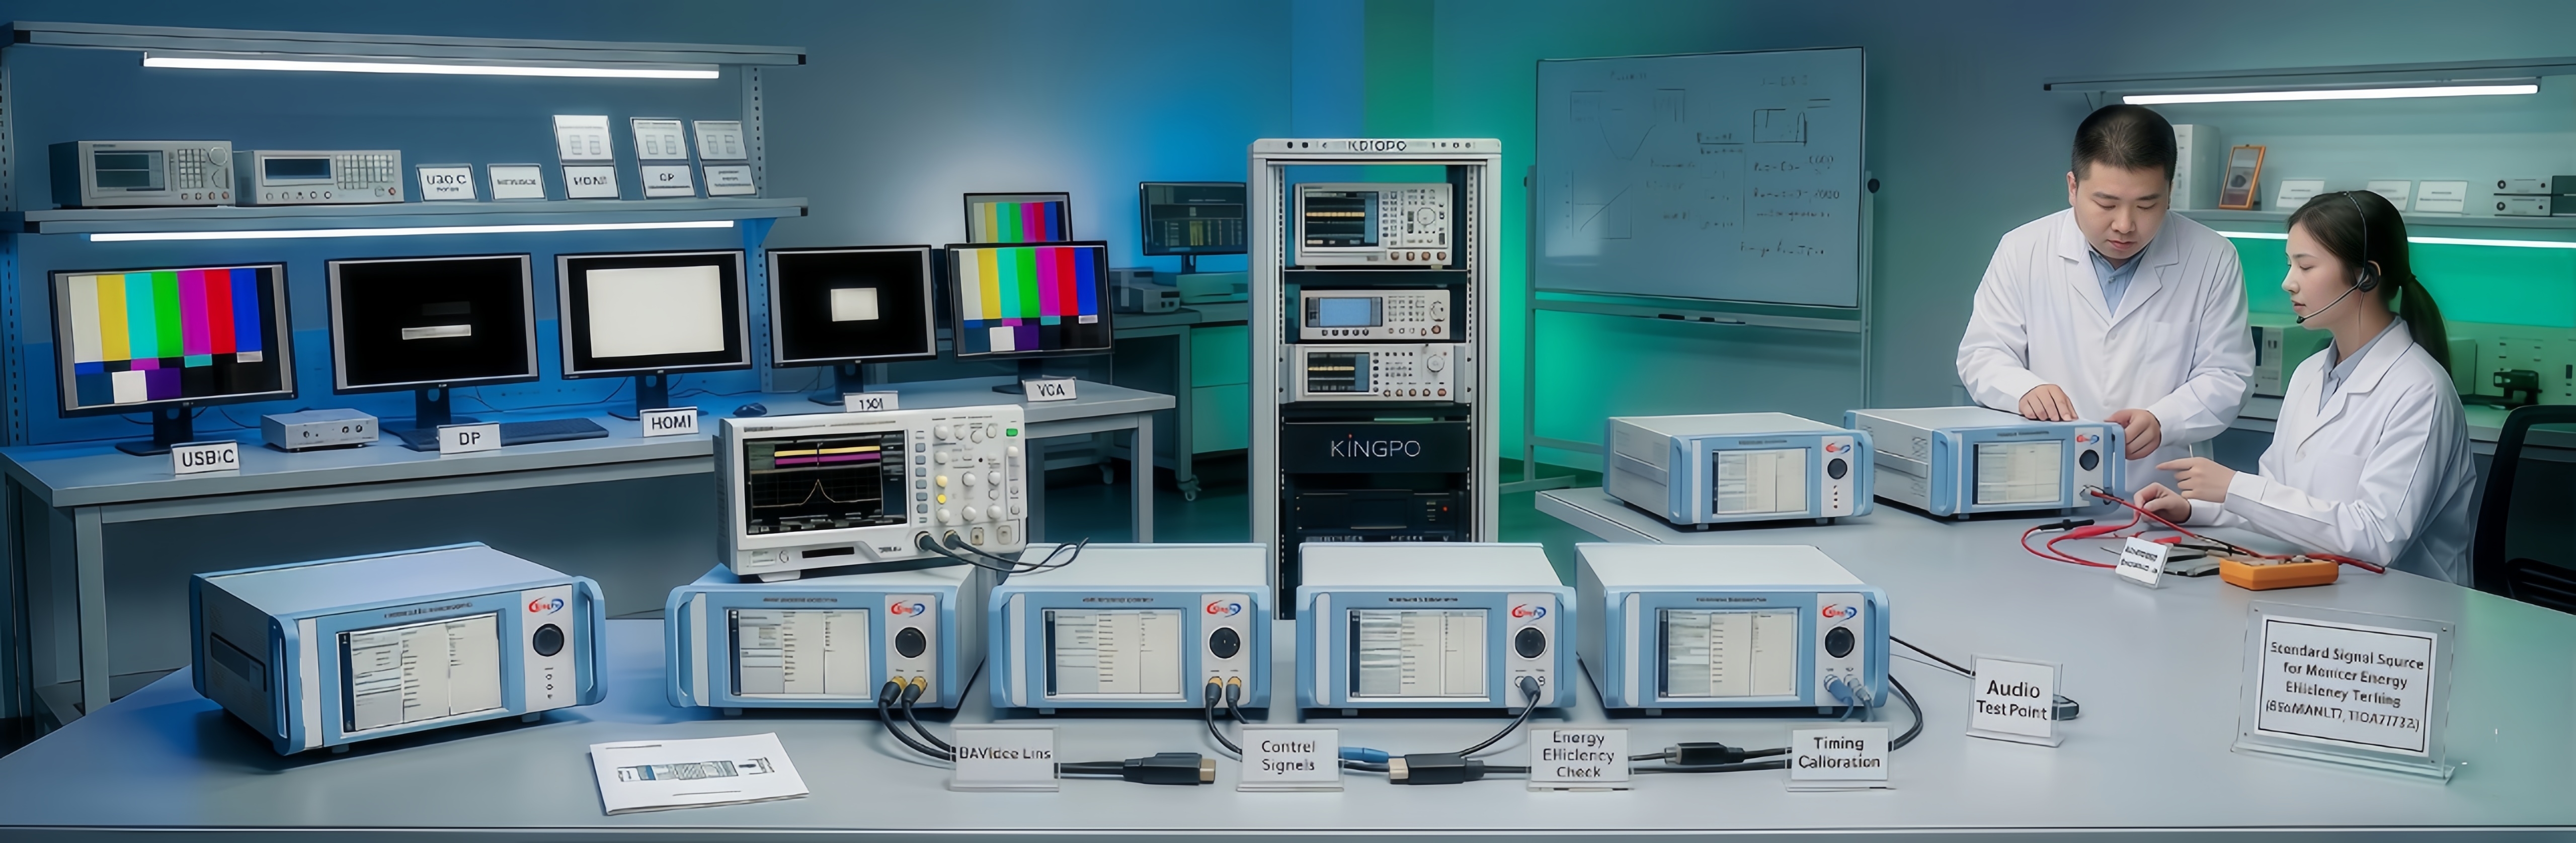
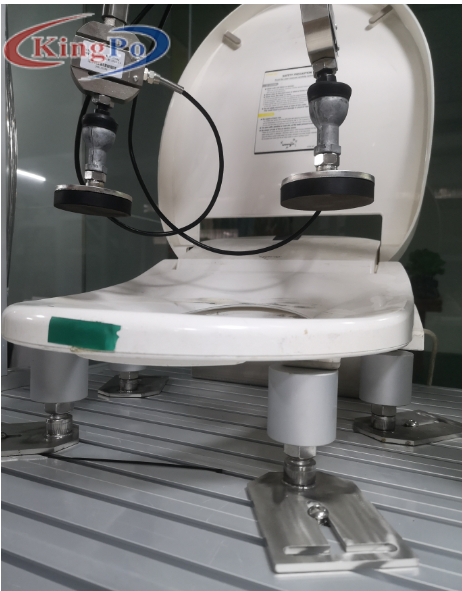
(১)স্মার্ট টয়লেটের এ স্টেশন (ইম্প্যাক্ট টেস্ট) এবং বি স্টেশন (সোয়িং টেস্ট) এর জন্য এই সরঞ্জাম ব্যবহার করা হয়।
(২)এই সরঞ্জামটি গঠিত অ্যালুমিনিয়াম ব্র্যাকেট, বায়ুসংক্রান্ত প্রক্রিয়া, চাপ প্লেট ইত্যাদির সমন্বয়ে গঠিত। বৈদ্যুতিক নিয়ন্ত্রণ অংশটি পিএলসি, মানব-মেশিন ইন্টারফেস, চাপ সেন্সর ইত্যাদির সমন্বয়ে গঠিত,এবং পরীক্ষার তথ্য সঠিক.
(৩)এই যন্ত্রপাতি দুটি কাজের স্টেশন আছে, যার প্রতিটি স্বাধীনভাবে পরীক্ষা করা যেতে পারে।
চিত্র ১ সরঞ্জামের সামগ্রিক চেহারা
2.উৎপাদন মান

এই পরীক্ষার সরঞ্জামটি নিম্নলিখিত মান অনুযায়ী ডিজাইন এবং নির্মিত হয়েছেঃ
ডিজাইন করা এবং তৈরি করা হয়েছে ২১ নং নং নং আইন অনুযায়ী।103.১ এবং ২১।103.২ আইইসি ৬০৩৩৫-২-৮৪;
6.7 সুইং টেস্ট, ৬.১০ খোলার এবং বন্ধ করার টেস্ট, ৬.১১ ধীর পতনের ফাংশন লাইফ টেস্ট এবং ৬.১২ জেসি/৭৬৪-২০০৮ এর উচ্চ চাপ পরীক্ষা;
3.প্রযুক্তিগত পরামিতি:
|
পাওয়ার সাপ্লাই |
AC220V±10%, ৫০/৬০ হার্জ |
|
মেশিন শক্তি |
1.৫ কিলোওয়াট |
স্ট্যাটিক চাপ এবং ধাক্কা পরীক্ষার স্টেশনঃ
|
শক্তি প্রয়োগের পদ্ধতি |
সিলিন্ডার শক্তি, নিয়মিত বায়ু চাপ |
|
ড্রাইভিং বায়ু চাপ |
0.5 এমপিএ |
|
বল প্রয়োগের সময় |
0 ~ 99.9 সেকেন্ড সেট করা যায় [স্ট্যান্ডার্ড 4 সেকেন্ড] |
|
চাপ প্লেট |
ব্যাসার্ধ ৩০০ মিমি, বেধ ৫ মিমি, শোর এ কঠোরতা ৭০ ডিগ্রি |
|
শক্তি মান |
0~1300N নিয়মিত [স্ট্যান্ডার্ড স্ট্যাটিক চাপ 1500N, প্রভাব 1250N] |
|
ফোর্স সেন্সর |
0.5 স্তর 200KgF |
|
প্রভাব গণনা |
0~999999999 বার সেট করা যেতে পারে |
সুইং টেস্ট স্টেশনঃ
|
শক্তি প্রয়োগের পদ্ধতি |
সিলিন্ডার শক্তি, নিয়মিত বায়ু চাপ |
|
সিলিন্ডার |
ব্যাসার্ধ 50mm, স্ট্রোক 125mm, প্রতিটি পাশে এক সেট |
|
চাপ প্লেট |
ব্যাসার্ধ ৭৬ মিমি, বেধ ১৯ মিমি, শোর এ কঠোরতা ৭০ ডিগ্রি |
|
ড্রাইভিং বায়ু চাপ |
0.5 এমপিএ |
|
বল প্রয়োগের সময় |
0 ~ 99.9 সেকেন্ড সেট করা যায় [স্ট্যান্ডার্ড 1.0 সেকেন্ড] |
|
শক্তি মান |
0~1300N নিয়মিত [890N] |
|
ফোর্স সেন্সর |
0.5 স্তর 200KgF প্রতিটি পাশের এক |
|
সুইং কাউন্ট |
0~999999999 বার সেট করা যেতে পারে |
4.ব্যবহারের পরিবেশ
(১)মেশিন এবং সরঞ্জাম বৃষ্টি, সূর্য এবং জারা থেকে সুরক্ষিত একটি পরিবেশে স্থাপন করা উচিত।
(২)পরিবেশে তাপমাত্রা 10~40°C, আপেক্ষিক আর্দ্রতা < 80%.
(৩)মেশিনটি কম্পন মুক্ত সমতল স্থানে স্থাপন করা উচিত এবং কম্পন ছাড়াই স্থিতিশীল রাখা উচিত।
5.মানব-কম্পিউটার ইন্টারঅ্যাকশন ইন্টারফেস অপারেশন নির্দেশাবলী
(১)ডিভাইসটি ইনস্টল করুন এবং পাওয়ার চালু করুন;
(২)ব্যবহারকারীর লগইন ইন্টারফেস, ব্যবহারকারীর পাসওয়ার্ড পরিবর্তন করুন (সমস্ত ব্যবহারকারীর জন্য মূল পাসওয়ার্ডঃ 1111):
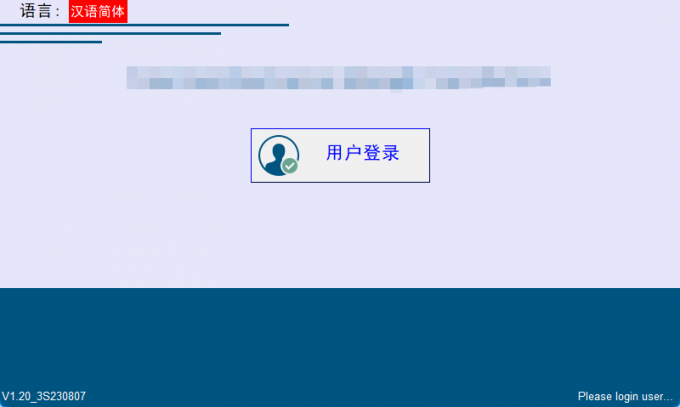
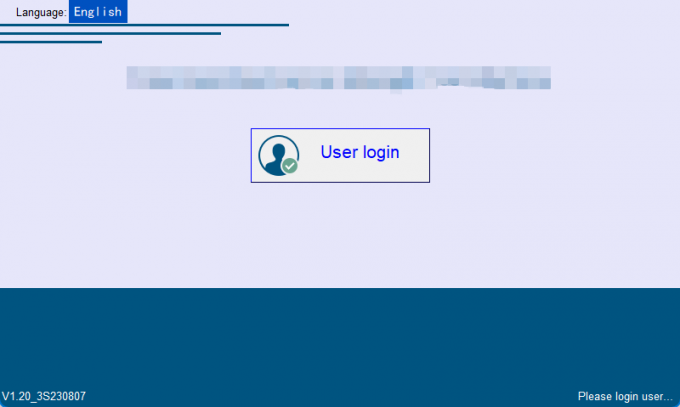
চিত্র2: বুট স্বাগতম স্ক্রিন
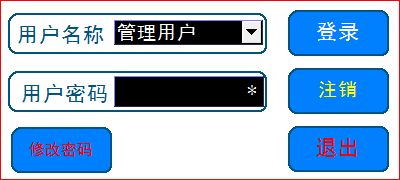
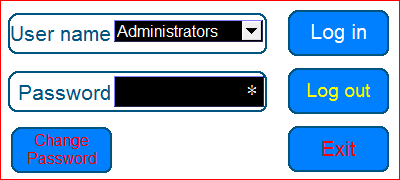
চিত্র3: লগইন এবং পাসওয়ার্ড পপ-আপ উইন্ডো
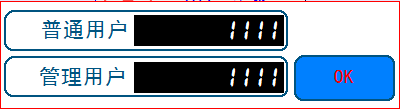
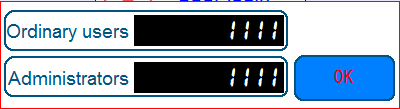
চিত্র4: পাসওয়ার্ড পরিবর্তন করুন পপ-আপ উইন্ডো
(৩)অপারেশন ইন্টারফেসঃ
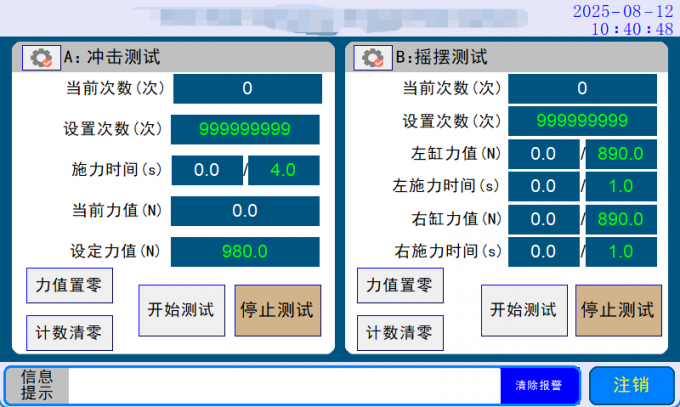

চিত্র 5: স্টেশন A1, স্টেশন B1 এ স্ট্যাটিক চাপ পরীক্ষা এবং স্টেশন C এ সুইং পরীক্ষা করার জন্য অপারেটিং পাতা
[লগআউট]:বর্তমান ব্যবহারকারীকে লগ আউট করুন এবং লগইন ইন্টারফেসে ফিরে যান;
[পরিষ্কার এলার্ম]: দয়া করে প্রথমে অ্যালার্ম বন্ধ করুন, তারপর এই বোতাম টিপুনঅ্যালার্ম পরিষ্কার করার জন্য;
একটি ধাক্কা পরীক্ষার স্টেশন
[গণনা পুনরায় সেট করুন]:দয়া করে গণনা মান শূন্যে পুনরায় সেট করুন;
[শক্তি মান শূন্য]:বর্তমান বলের মানের বিচ্যুতি শূন্যে সেট করুন;
[পরীক্ষা শুরু করুন]:স্টার্ট টেস্ট বোতাম;
[পরীক্ষা বন্ধ করুন]:স্টপ টেস্ট বোতাম;
[বর্তমান সংখ্যা]:বর্তমান নম্বর প্রদর্শন করুন;
[সময় নির্ধারণ করুন]:বার সংখ্যা সেট করুন, এবং মেশিন বর্তমান সংখ্যা পৌঁছে যখন বন্ধ হবে;
[শক্তি প্রয়োগের সময়]:বল প্রয়োগের সময় প্রদর্শন এবং সেটিং;
[বর্তমান বলের মান]:বর্তমান বলের মান প্রদর্শন করা হয়;
[শক্তি মান সেট করুন]:বলের মান সেট করুন;
B সুইং টেস্ট স্টেশন
[গণনা পুনরায় সেট করুন]:দয়া করে গণনা মান শূন্যে পুনরায় সেট করুন;
[শক্তি মান শূন্য]:বর্তমান বলের মানের বিচ্যুতি শূন্যে সেট করুন;
[পরীক্ষা শুরু করুন]:স্টার্ট টেস্ট বোতাম;
[পরীক্ষা বন্ধ করুন]:স্টপ টেস্ট বোতাম;
[বর্তমান সংখ্যা]:বর্তমান নম্বর প্রদর্শন করুন;
[সময় নির্ধারণ করুন]:বার সংখ্যা সেট করুন, এবং মেশিন বর্তমান সংখ্যা পৌঁছে যখন বন্ধ হবে;
[বাম সিলিন্ডারের শক্তির মান]:বাম সিলিন্ডারের বলের মান এবং প্রদর্শন সেট করুন;
[বাম শক্তি প্রয়োগের সময়]:বাম সিলিন্ডারের শক্তি প্রয়োগের সময় এবং প্রদর্শন সেট করুন;
[ডান সিলিন্ডার শক্তি মান]:সঠিক সিলিন্ডার শক্তি মান এবং প্রদর্শন সেট করুন;
[সঠিক শক্তি প্রয়োগের সময়]:সঠিক সিলিন্ডার শক্তি প্রয়োগের সময় এবং প্রদর্শন সেট করুন;
(৪)প্যারামিটার এবং ডিবাগিং পপ-আপ উইন্ডো (প্রতিটি স্টেশনের উপরের বাম কোণে বোতাম টিপুন![]() প্যারামিটার এবং ডিবাগিং উইন্ডো পপ আপ করতে ):
প্যারামিটার এবং ডিবাগিং উইন্ডো পপ আপ করতে ):
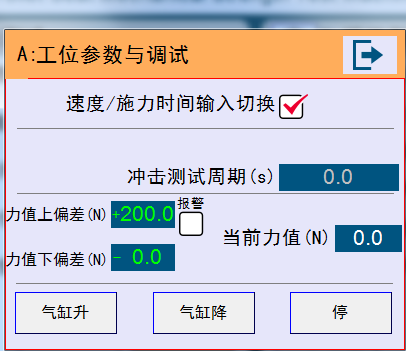
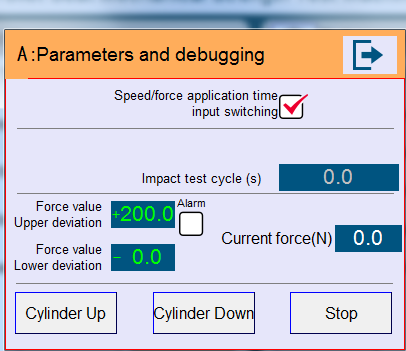
চিত্র6:স্টেশন বি প্যারামিটার এবং ডিবাগিং পপ-আপ উইন্ডো
[সিলিন্ডার উত্তোলন]:ম্যানুয়াল সিলিন্ডার লিফট বোতাম;
[সিলিন্ডার নিচে]:ম্যানুয়াল সিলিন্ডার ডাউন বোতাম;
[থামো]:ম্যানুয়াল স্টপ বোতাম;
[শক ক্ষতিপূরণ সময়]:শক টেস্টের সময় প্রতিটি চক্র না পৌঁছলে ক্ষতিপূরণ সময়;
[শক টেস্ট চক্র]:শক পরীক্ষার চক্রের সময় দেখায়;
[শক্তির উপরের বিচ্যুতি] এবং [শক্তির নিম্নতম বিচ্যুতি]শক্তির উপরের বিচ্যুতি সতর্কতা শক্তির মান এবং নিম্ন বিচ্যুতির কাজের পরামিতি সেট করুন;
[বর্তমান বলের মান]:বর্তমান বলের মান প্রদর্শন করা হয়;
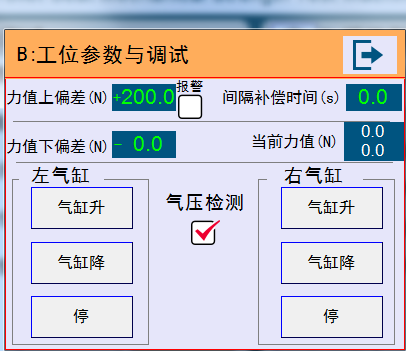
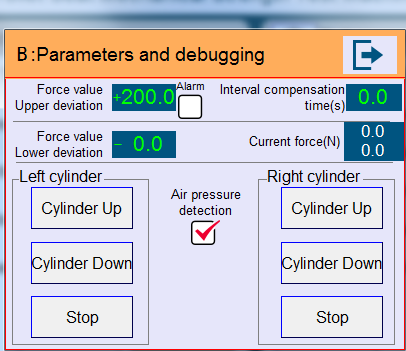
চিত্র7: স্টেশন সি প্যারামিটার এবং ডিবাগিং পপ-আপ উইন্ডো
[সিলিন্ডার উত্তোলন]:ম্যানুয়াল সিলিন্ডার লিফট বোতাম;
[সিলিন্ডার নিচে]:ম্যানুয়াল সিলিন্ডার ডাউন বোতাম;
[থামো]:ম্যানুয়াল স্টপ বোতাম;
[ফোর্স উপরের বিচ্যুতি] এবং [ফোর্স নীচের বিচ্যুতি]শক্তির উপরের বিচ্যুতি সতর্কতা শক্তির মান এবং নিম্ন বিচ্যুতির কাজের পরামিতি সেট করুন;
[অন্তরকালীন ক্ষতিপূরণের সময়]:স্ট্যান্ডার্ড প্রয়োজনীয়তা হল প্রায় ০.৫ সেকেন্ডের একটি সিলিন্ডার ইন্টারভাল প্রেসিং সময়। যদি এটি পৌঁছায় না, এই সময় ক্ষতিপূরণ সেট করুন;
[বর্তমান বলের মান]:বর্তমান বলের মান প্রদর্শন করা হয়;
(৫)ইতিহাস ইন্টারফেস (অপারেশন ইন্টারফেসের নীচে তথ্য প্রদর্শন বাক্সে দীর্ঘ চাপ দিন এই ইন্টারফেসে প্রবেশ করতে, যেখানে আপনি সিস্টেমের সময় সেট করতে পারেন):


চিত্র8:ওয়ার্কস্টেশন ইতিহাস পাতা
[ফিরে যান]:প্রধান অপারেশন পৃষ্ঠায় ফিরে যান;
[ইন্টারফেস সময় প্রদর্শন সেটিংস]:এই পৃষ্ঠার উপরের ডান কোণে সিস্টেমের সময় সেট করা যেতে পারে;
6.অপারেশন প্রক্রিয়া
(১)যন্ত্রের ইনস্টলেশনের স্তর এবং মেশিনের পায়ের অবস্থান সামঞ্জস্য করুন;
(২)প্রতিটি স্টেশনে নমুনা স্থাপন করুন, সরবরাহিত প্রজাপতি স্ক্রু দিয়ে নমুনাটি স্থির করুন এবং নমুনার স্তরটি সামঞ্জস্য করুন;
(৩)পাওয়ার সাপ্লাই সংযুক্ত করুন এবং শক্তি চালু করুন.বৈদ্যুতিক শক দুর্ঘটনা প্রতিরোধ করার জন্য সঠিকভাবে গ্রাউন্ড করা উচিত;
(৪)প্রভাব পরীক্ষাঃ
১)ফোর্স সেন্সর উপর শক্তি প্রয়োগকারী বৃত্তাকার ইস্পাত প্লেট স্থির; স্ট্যাটিক জন্যচাপ পরীক্ষা, একটি ø160mm ব্যবহারবৃত্তাকারইস্পাত প্লেট; প্রভাব পরীক্ষার জন্য, ব্যবহারএকটি ø300mmগোলাকার ইস্পাত প্লেট;
২)নমুনা এবং শক্তি প্রয়োগ করা ইস্পাত প্লেট অবস্থান নিয়ন্ত্রন করুনপ্যারামিটারে ম্যানুয়াল বোতাম টিপুন এবং পপ-আপ উইন্ডো ডিবাগিংএবং আউটপুট শক্তি মান অনুযায়ী বায়ু চাপ সমন্বয়.সামঞ্জস্য শেষ হলে, সিলিন্ডারটিকে তার মূল অবস্থানে ফিরিয়ে আনুন।
৩)অপারেশন ইন্টারফেস প্রবেশ করুন এবং টিপুন[শক্তি মান শূন্য] বর্তমান শক্তি মান পুনরায় সেট করতে;
৪)B স্টেশন ফাংশনটি পরীক্ষা করা ফাংশনে সেট করুন, শেষ গণনাটি পরিষ্কার করুন,এবং বলের মান, বার সংখ্যা এবং বল প্রয়োগের সময় সেট করুন;
৫)প্রধান অপারেশন ইন্টারফেসে [স্টার্ট টেস্ট] বোতাম টিপুন এবং ডিভাইসটি স্বয়ংক্রিয়ভাবে খোলার এবং বন্ধ করার পরীক্ষা সম্পাদন করবে এবং স্বয়ংক্রিয়ভাবে গণনা করবেসময়;
৬)পরীক্ষা সম্পূর্ণ হলে স্বয়ংক্রিয়ভাবে বন্ধ হবে এবং প্রম্পট বক্সে প্রদর্শিত হবে; যদি আপনি পরীক্ষা চলাকালীন বন্ধ করতে চান, [স্টপ টেস্ট] বোতাম টিপুন; যদি আপনি জরুরীভাবে বন্ধ করতে চান,জরুরী স্টপ বোতাম টিপুন;
৭)পরীক্ষা সম্পন্ন নমুনাগুলি সরিয়ে নিন এবং নমুনাগুলি পরীক্ষা করুন।
(৫)সুইং টেস্টঃ
১)নমুনা এবং শক্তি প্রয়োগ করা ইস্পাত প্লেট অবস্থান নিয়ন্ত্রন করুনপ্যারামিটারে ম্যানুয়াল বোতাম টিপুন এবং পপ-আপ উইন্ডো ডিবাগিংএবং আউটপুট শক্তি মান অনুযায়ী বায়ু চাপ সমন্বয়.সামঞ্জস্য শেষ হলে, সিলিন্ডারটিকে তার মূল অবস্থানে ফিরিয়ে আনুন।
২)অপারেশন ইন্টারফেস প্রবেশ করুন এবং টিপুন[শক্তি মান শূন্য] বর্তমান শক্তি মান পুনরায় সেট করতে;
৩)প্রধান অপারেশন ইন্টারফেসে শেষ গণনা পরিষ্কার করুন এবং শক্তির মান, বার সংখ্যা বা প্রয়োগের সময় সেট করুন;
৪)প্রধান অপারেশন ইন্টারফেসে [স্টার্ট টেস্ট] বোতাম টিপুন এবং ডিভাইসটি স্বয়ংক্রিয়ভাবে খোলার এবং বন্ধ করার পরীক্ষা সম্পাদন করবে এবং স্বয়ংক্রিয়ভাবে গণনা করবেসময়;
৫)পরীক্ষা শেষ হলে স্বয়ংক্রিয়ভাবে বন্ধ হয়ে যাবে এবং বার্তাটিআপনি যদি পরীক্ষা চলাকালীন থামতে চান, তাহলে[স্টপ টেস্ট] বোতাম। যদি আপনি অবিলম্বে বন্ধ করতে চান, জরুরী স্টপ বোতাম টিপুন।
৬)পরীক্ষা সম্পন্ন নমুনাগুলি সরিয়ে নিন এবং নমুনাগুলি পরীক্ষা করুন।
7.সতর্কতা এবং রক্ষণাবেক্ষণ
(১)নিরাপত্তা দুর্ঘটনা এড়ানোর জন্য মেশিনটি ভালভাবে গ্রাউন্ডেড রয়েছে তা নিশ্চিত করুন।
(২)চাপ সেন্সরকে ক্ষতিগ্রস্ত না করার জন্য পরীক্ষার সময় অনুমোদিত লোড অতিক্রম করবেন না।
(৩)মেশিনের অংশটি পরিষ্কার রাখার জন্য প্রায়শই মুছে ফেলা উচিত।

|
|
| MOQ.: | 1 |
| মূল্য: | To be quoted |
| স্ট্যান্ডার্ড প্যাকিং: | সুরক্ষা কার্টন প্যাক বা পাতলা পাতলা কাঠের বাক্স |
| অর্থ প্রদানের পদ্ধতি: | টি/টি |
1.সংক্ষিপ্ত বিবরণ:
(১)স্মার্ট টয়লেটের এ স্টেশন (ইম্প্যাক্ট টেস্ট) এবং বি স্টেশন (সোয়িং টেস্ট) এর জন্য এই সরঞ্জাম ব্যবহার করা হয়।
(২)এই সরঞ্জামটি গঠিত অ্যালুমিনিয়াম ব্র্যাকেট, বায়ুসংক্রান্ত প্রক্রিয়া, চাপ প্লেট ইত্যাদির সমন্বয়ে গঠিত। বৈদ্যুতিক নিয়ন্ত্রণ অংশটি পিএলসি, মানব-মেশিন ইন্টারফেস, চাপ সেন্সর ইত্যাদির সমন্বয়ে গঠিত,এবং পরীক্ষার তথ্য সঠিক.
(৩)এই যন্ত্রপাতি দুটি কাজের স্টেশন আছে, যার প্রতিটি স্বাধীনভাবে পরীক্ষা করা যেতে পারে।
চিত্র ১ সরঞ্জামের সামগ্রিক চেহারা
2.উৎপাদন মান
এই পরীক্ষার সরঞ্জামটি নিম্নলিখিত মান অনুযায়ী ডিজাইন এবং নির্মিত হয়েছেঃ
ডিজাইন করা এবং তৈরি করা হয়েছে ২১ নং নং নং আইন অনুযায়ী।103.১ এবং ২১।103.২ আইইসি ৬০৩৩৫-২-৮৪;
6.7 সুইং টেস্ট, ৬.১০ খোলার এবং বন্ধ করার টেস্ট, ৬.১১ ধীর পতনের ফাংশন লাইফ টেস্ট এবং ৬.১২ জেসি/৭৬৪-২০০৮ এর উচ্চ চাপ পরীক্ষা;
3.প্রযুক্তিগত পরামিতি:
|
পাওয়ার সাপ্লাই |
AC220V±10%, ৫০/৬০ হার্জ |
|
মেশিন শক্তি |
1.৫ কিলোওয়াট |
স্ট্যাটিক চাপ এবং ধাক্কা পরীক্ষার স্টেশনঃ
|
শক্তি প্রয়োগের পদ্ধতি |
সিলিন্ডার শক্তি, নিয়মিত বায়ু চাপ |
|
ড্রাইভিং বায়ু চাপ |
0.5 এমপিএ |
|
বল প্রয়োগের সময় |
0 ~ 99.9 সেকেন্ড সেট করা যায় [স্ট্যান্ডার্ড 4 সেকেন্ড] |
|
চাপ প্লেট |
ব্যাসার্ধ ৩০০ মিমি, বেধ ৫ মিমি, শোর এ কঠোরতা ৭০ ডিগ্রি |
|
শক্তি মান |
0~1300N নিয়মিত [স্ট্যান্ডার্ড স্ট্যাটিক চাপ 1500N, প্রভাব 1250N] |
|
ফোর্স সেন্সর |
0.5 স্তর 200KgF |
|
প্রভাব গণনা |
0~999999999 বার সেট করা যেতে পারে |
সুইং টেস্ট স্টেশনঃ
|
শক্তি প্রয়োগের পদ্ধতি |
সিলিন্ডার শক্তি, নিয়মিত বায়ু চাপ |
|
সিলিন্ডার |
ব্যাসার্ধ 50mm, স্ট্রোক 125mm, প্রতিটি পাশে এক সেট |
|
চাপ প্লেট |
ব্যাসার্ধ ৭৬ মিমি, বেধ ১৯ মিমি, শোর এ কঠোরতা ৭০ ডিগ্রি |
|
ড্রাইভিং বায়ু চাপ |
0.5 এমপিএ |
|
বল প্রয়োগের সময় |
0 ~ 99.9 সেকেন্ড সেট করা যায় [স্ট্যান্ডার্ড 1.0 সেকেন্ড] |
|
শক্তি মান |
0~1300N নিয়মিত [890N] |
|
ফোর্স সেন্সর |
0.5 স্তর 200KgF প্রতিটি পাশের এক |
|
সুইং কাউন্ট |
0~999999999 বার সেট করা যেতে পারে |
4.ব্যবহারের পরিবেশ
(১)মেশিন এবং সরঞ্জাম বৃষ্টি, সূর্য এবং জারা থেকে সুরক্ষিত একটি পরিবেশে স্থাপন করা উচিত।
(২)পরিবেশে তাপমাত্রা 10~40°C, আপেক্ষিক আর্দ্রতা < 80%.
(৩)মেশিনটি কম্পন মুক্ত সমতল স্থানে স্থাপন করা উচিত এবং কম্পন ছাড়াই স্থিতিশীল রাখা উচিত।
5.মানব-কম্পিউটার ইন্টারঅ্যাকশন ইন্টারফেস অপারেশন নির্দেশাবলী
(১)ডিভাইসটি ইনস্টল করুন এবং পাওয়ার চালু করুন;
(২)ব্যবহারকারীর লগইন ইন্টারফেস, ব্যবহারকারীর পাসওয়ার্ড পরিবর্তন করুন (সমস্ত ব্যবহারকারীর জন্য মূল পাসওয়ার্ডঃ 1111):
চিত্র2: বুট স্বাগতম স্ক্রিন
চিত্র3: লগইন এবং পাসওয়ার্ড পপ-আপ উইন্ডো
চিত্র4: পাসওয়ার্ড পরিবর্তন করুন পপ-আপ উইন্ডো
(৩)অপারেশন ইন্টারফেসঃ
চিত্র 5: স্টেশন A1, স্টেশন B1 এ স্ট্যাটিক চাপ পরীক্ষা এবং স্টেশন C এ সুইং পরীক্ষা করার জন্য অপারেটিং পাতা
[লগআউট]:বর্তমান ব্যবহারকারীকে লগ আউট করুন এবং লগইন ইন্টারফেসে ফিরে যান;
[পরিষ্কার এলার্ম]: দয়া করে প্রথমে অ্যালার্ম বন্ধ করুন, তারপর এই বোতাম টিপুনঅ্যালার্ম পরিষ্কার করার জন্য;
একটি ধাক্কা পরীক্ষার স্টেশন
[গণনা পুনরায় সেট করুন]:দয়া করে গণনা মান শূন্যে পুনরায় সেট করুন;
[শক্তি মান শূন্য]:বর্তমান বলের মানের বিচ্যুতি শূন্যে সেট করুন;
[পরীক্ষা শুরু করুন]:স্টার্ট টেস্ট বোতাম;
[পরীক্ষা বন্ধ করুন]:স্টপ টেস্ট বোতাম;
[বর্তমান সংখ্যা]:বর্তমান নম্বর প্রদর্শন করুন;
[সময় নির্ধারণ করুন]:বার সংখ্যা সেট করুন, এবং মেশিন বর্তমান সংখ্যা পৌঁছে যখন বন্ধ হবে;
[শক্তি প্রয়োগের সময়]:বল প্রয়োগের সময় প্রদর্শন এবং সেটিং;
[বর্তমান বলের মান]:বর্তমান বলের মান প্রদর্শন করা হয়;
[শক্তি মান সেট করুন]:বলের মান সেট করুন;
B সুইং টেস্ট স্টেশন
[গণনা পুনরায় সেট করুন]:দয়া করে গণনা মান শূন্যে পুনরায় সেট করুন;
[শক্তি মান শূন্য]:বর্তমান বলের মানের বিচ্যুতি শূন্যে সেট করুন;
[পরীক্ষা শুরু করুন]:স্টার্ট টেস্ট বোতাম;
[পরীক্ষা বন্ধ করুন]:স্টপ টেস্ট বোতাম;
[বর্তমান সংখ্যা]:বর্তমান নম্বর প্রদর্শন করুন;
[সময় নির্ধারণ করুন]:বার সংখ্যা সেট করুন, এবং মেশিন বর্তমান সংখ্যা পৌঁছে যখন বন্ধ হবে;
[বাম সিলিন্ডারের শক্তির মান]:বাম সিলিন্ডারের বলের মান এবং প্রদর্শন সেট করুন;
[বাম শক্তি প্রয়োগের সময়]:বাম সিলিন্ডারের শক্তি প্রয়োগের সময় এবং প্রদর্শন সেট করুন;
[ডান সিলিন্ডার শক্তি মান]:সঠিক সিলিন্ডার শক্তি মান এবং প্রদর্শন সেট করুন;
[সঠিক শক্তি প্রয়োগের সময়]:সঠিক সিলিন্ডার শক্তি প্রয়োগের সময় এবং প্রদর্শন সেট করুন;
(৪)প্যারামিটার এবং ডিবাগিং পপ-আপ উইন্ডো (প্রতিটি স্টেশনের উপরের বাম কোণে বোতাম টিপুন![]() প্যারামিটার এবং ডিবাগিং উইন্ডো পপ আপ করতে ):
প্যারামিটার এবং ডিবাগিং উইন্ডো পপ আপ করতে ):
চিত্র6:স্টেশন বি প্যারামিটার এবং ডিবাগিং পপ-আপ উইন্ডো
[সিলিন্ডার উত্তোলন]:ম্যানুয়াল সিলিন্ডার লিফট বোতাম;
[সিলিন্ডার নিচে]:ম্যানুয়াল সিলিন্ডার ডাউন বোতাম;
[থামো]:ম্যানুয়াল স্টপ বোতাম;
[শক ক্ষতিপূরণ সময়]:শক টেস্টের সময় প্রতিটি চক্র না পৌঁছলে ক্ষতিপূরণ সময়;
[শক টেস্ট চক্র]:শক পরীক্ষার চক্রের সময় দেখায়;
[শক্তির উপরের বিচ্যুতি] এবং [শক্তির নিম্নতম বিচ্যুতি]শক্তির উপরের বিচ্যুতি সতর্কতা শক্তির মান এবং নিম্ন বিচ্যুতির কাজের পরামিতি সেট করুন;
[বর্তমান বলের মান]:বর্তমান বলের মান প্রদর্শন করা হয়;
চিত্র7: স্টেশন সি প্যারামিটার এবং ডিবাগিং পপ-আপ উইন্ডো
[সিলিন্ডার উত্তোলন]:ম্যানুয়াল সিলিন্ডার লিফট বোতাম;
[সিলিন্ডার নিচে]:ম্যানুয়াল সিলিন্ডার ডাউন বোতাম;
[থামো]:ম্যানুয়াল স্টপ বোতাম;
[ফোর্স উপরের বিচ্যুতি] এবং [ফোর্স নীচের বিচ্যুতি]শক্তির উপরের বিচ্যুতি সতর্কতা শক্তির মান এবং নিম্ন বিচ্যুতির কাজের পরামিতি সেট করুন;
[অন্তরকালীন ক্ষতিপূরণের সময়]:স্ট্যান্ডার্ড প্রয়োজনীয়তা হল প্রায় ০.৫ সেকেন্ডের একটি সিলিন্ডার ইন্টারভাল প্রেসিং সময়। যদি এটি পৌঁছায় না, এই সময় ক্ষতিপূরণ সেট করুন;
[বর্তমান বলের মান]:বর্তমান বলের মান প্রদর্শন করা হয়;
(৫)ইতিহাস ইন্টারফেস (অপারেশন ইন্টারফেসের নীচে তথ্য প্রদর্শন বাক্সে দীর্ঘ চাপ দিন এই ইন্টারফেসে প্রবেশ করতে, যেখানে আপনি সিস্টেমের সময় সেট করতে পারেন):
চিত্র8:ওয়ার্কস্টেশন ইতিহাস পাতা
[ফিরে যান]:প্রধান অপারেশন পৃষ্ঠায় ফিরে যান;
[ইন্টারফেস সময় প্রদর্শন সেটিংস]:এই পৃষ্ঠার উপরের ডান কোণে সিস্টেমের সময় সেট করা যেতে পারে;
6.অপারেশন প্রক্রিয়া
(১)যন্ত্রের ইনস্টলেশনের স্তর এবং মেশিনের পায়ের অবস্থান সামঞ্জস্য করুন;
(২)প্রতিটি স্টেশনে নমুনা স্থাপন করুন, সরবরাহিত প্রজাপতি স্ক্রু দিয়ে নমুনাটি স্থির করুন এবং নমুনার স্তরটি সামঞ্জস্য করুন;
(৩)পাওয়ার সাপ্লাই সংযুক্ত করুন এবং শক্তি চালু করুন.বৈদ্যুতিক শক দুর্ঘটনা প্রতিরোধ করার জন্য সঠিকভাবে গ্রাউন্ড করা উচিত;
(৪)প্রভাব পরীক্ষাঃ
১)ফোর্স সেন্সর উপর শক্তি প্রয়োগকারী বৃত্তাকার ইস্পাত প্লেট স্থির; স্ট্যাটিক জন্যচাপ পরীক্ষা, একটি ø160mm ব্যবহারবৃত্তাকারইস্পাত প্লেট; প্রভাব পরীক্ষার জন্য, ব্যবহারএকটি ø300mmগোলাকার ইস্পাত প্লেট;
২)নমুনা এবং শক্তি প্রয়োগ করা ইস্পাত প্লেট অবস্থান নিয়ন্ত্রন করুনপ্যারামিটারে ম্যানুয়াল বোতাম টিপুন এবং পপ-আপ উইন্ডো ডিবাগিংএবং আউটপুট শক্তি মান অনুযায়ী বায়ু চাপ সমন্বয়.সামঞ্জস্য শেষ হলে, সিলিন্ডারটিকে তার মূল অবস্থানে ফিরিয়ে আনুন।
৩)অপারেশন ইন্টারফেস প্রবেশ করুন এবং টিপুন[শক্তি মান শূন্য] বর্তমান শক্তি মান পুনরায় সেট করতে;
৪)B স্টেশন ফাংশনটি পরীক্ষা করা ফাংশনে সেট করুন, শেষ গণনাটি পরিষ্কার করুন,এবং বলের মান, বার সংখ্যা এবং বল প্রয়োগের সময় সেট করুন;
৫)প্রধান অপারেশন ইন্টারফেসে [স্টার্ট টেস্ট] বোতাম টিপুন এবং ডিভাইসটি স্বয়ংক্রিয়ভাবে খোলার এবং বন্ধ করার পরীক্ষা সম্পাদন করবে এবং স্বয়ংক্রিয়ভাবে গণনা করবেসময়;
৬)পরীক্ষা সম্পূর্ণ হলে স্বয়ংক্রিয়ভাবে বন্ধ হবে এবং প্রম্পট বক্সে প্রদর্শিত হবে; যদি আপনি পরীক্ষা চলাকালীন বন্ধ করতে চান, [স্টপ টেস্ট] বোতাম টিপুন; যদি আপনি জরুরীভাবে বন্ধ করতে চান,জরুরী স্টপ বোতাম টিপুন;
৭)পরীক্ষা সম্পন্ন নমুনাগুলি সরিয়ে নিন এবং নমুনাগুলি পরীক্ষা করুন।
(৫)সুইং টেস্টঃ
১)নমুনা এবং শক্তি প্রয়োগ করা ইস্পাত প্লেট অবস্থান নিয়ন্ত্রন করুনপ্যারামিটারে ম্যানুয়াল বোতাম টিপুন এবং পপ-আপ উইন্ডো ডিবাগিংএবং আউটপুট শক্তি মান অনুযায়ী বায়ু চাপ সমন্বয়.সামঞ্জস্য শেষ হলে, সিলিন্ডারটিকে তার মূল অবস্থানে ফিরিয়ে আনুন।
২)অপারেশন ইন্টারফেস প্রবেশ করুন এবং টিপুন[শক্তি মান শূন্য] বর্তমান শক্তি মান পুনরায় সেট করতে;
৩)প্রধান অপারেশন ইন্টারফেসে শেষ গণনা পরিষ্কার করুন এবং শক্তির মান, বার সংখ্যা বা প্রয়োগের সময় সেট করুন;
৪)প্রধান অপারেশন ইন্টারফেসে [স্টার্ট টেস্ট] বোতাম টিপুন এবং ডিভাইসটি স্বয়ংক্রিয়ভাবে খোলার এবং বন্ধ করার পরীক্ষা সম্পাদন করবে এবং স্বয়ংক্রিয়ভাবে গণনা করবেসময়;
৫)পরীক্ষা শেষ হলে স্বয়ংক্রিয়ভাবে বন্ধ হয়ে যাবে এবং বার্তাটিআপনি যদি পরীক্ষা চলাকালীন থামতে চান, তাহলে[স্টপ টেস্ট] বোতাম। যদি আপনি অবিলম্বে বন্ধ করতে চান, জরুরী স্টপ বোতাম টিপুন।
৬)পরীক্ষা সম্পন্ন নমুনাগুলি সরিয়ে নিন এবং নমুনাগুলি পরীক্ষা করুন।
7.সতর্কতা এবং রক্ষণাবেক্ষণ
(১)নিরাপত্তা দুর্ঘটনা এড়ানোর জন্য মেশিনটি ভালভাবে গ্রাউন্ডেড রয়েছে তা নিশ্চিত করুন।
(২)চাপ সেন্সরকে ক্ষতিগ্রস্ত না করার জন্য পরীক্ষার সময় অনুমোদিত লোড অতিক্রম করবেন না।
(৩)মেশিনের অংশটি পরিষ্কার রাখার জন্য প্রায়শই মুছে ফেলা উচিত।
ঠিকানা
আরএম সি, 13 / এফ, হার্ভার্ড বাণিজ্যিক বাণিজ্যিক ভবন, 105-111 থমসন রোড, ওয়াং চাই, এইচ.কে.
টেলিফোন
86-769- 81627526
ই-মেইল
sales@kingpo.hk